The Perfect Two-Day Shimanami Kaido Itinerary
If you’ve ended up here, you’re probably planning your Shimanami Kaido adventure and frankly, I’m pretty envious of you. I’ve put together the ideal two-day Shimanami Kaido itinerary, based on personal experience and what I’ve learned since.
While it’s possible to complete the entire route in a day, it means about 8-10 hours of continuous cycling and it’s typically recommended for serious, experienced cyclists who are more focused on completing the cycle than sightseeing. Splitting the route over two days gives you a chance to stop, sightsee and take more breaks.
To give you some personal perspective: I’m a casual cyclist. I take my bike out to go to the shops, to meet friends, or the occasional 25-minute ride to the office. I’m in no way an experienced cyclist and my bike is entirely form over function (it’s very cute though to be fair). The Shimanami Kaido is the longest cycle I’ve ever done. Could I have done it over a single day? Probably. Would I have whinged the entire time? Almost definitely.
Doing a two-day Shimanami Kaido ride was still challenging, but in a very manageable and completely enjoyable way. Because we had less time pressure, we could stop for breaks, photos, or being real, to wheel the bike up the hills.
Breaking the ride up over two days gives you a chance to rest and feel restored for the next day, plus some more buffer room to see the sights of the islands that are off the main cycle route.
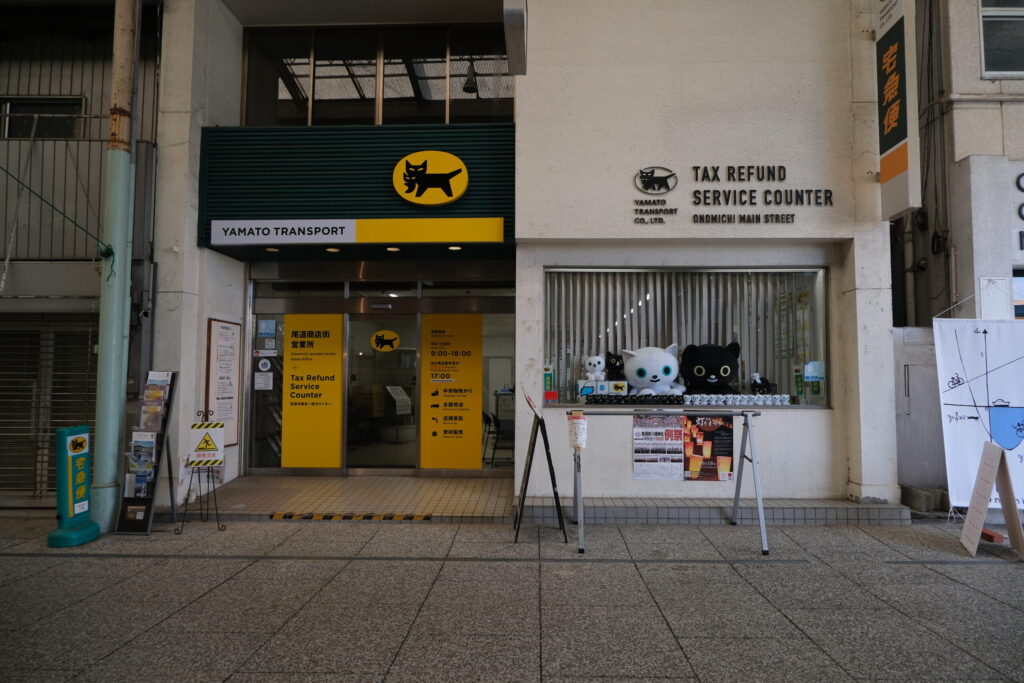
On our cycle, we took the most popular route, starting in Onomichi and ending in Imabari. This route tends to have the wind at your back, riding off the main island of Honshu, and makes for a slightly easier ride. This is the route I’ve outlined in this itinerary, although if you want to do it back-to-front, have at it!
I’ve written a separate post on how to get to and from the Shimanami Kaido, which you can find here.
In this post, I’ve broken down the pre-trip planning, as well as how you’ll spend your two-day Shimanami Kaido cycle. I’ve also simplified the itinerary down into a downloadable PDF, including a map drawn by yours truly. Download it and keep it to hand during your ride!
Pre-Trip Planning
Bike Rental

If you’re travelling from abroad, you’re probably going to need to rent a bike. Getting the right bike can make all the difference for the comfort of your ride, and believe me, you’re going to need to book it in advance.
You’ve got one immediate choice to make: Whether you go with the public rental system or private. Public is cheaper, with more cycle stations along the route; private is more expensive but gives you a wider range to choose from.
I’ve gone into more detail in the Bike Rental Guide, which breaks down estimated costs and the pros and cons of the different bike types available to you.
Spring and Autumn tend to be the busiest seasons, so book your bikes well in advance. We booked ours about a month out, and the e-bikes were already unavailable, so don’t say I didn’t warn you!
Luggage Strategy
Once you’ve got your bike booked, you need to think about your bags. If you’re travelling to Japan from abroad, you’re probably not going to be carry-on only (although my husband did once do this on a two-week trip to the US and I’m still baffled).
You cannot do this cycle with a large suitcase or a huge backpacker-style backpack. It’ll ruin your experience, and it’s not completely safe. On the ferry from Onomichi to Mukaishima, there was a man attempting to prop up his wheely case in his bike basket, and it did not look like a good time.
To shed yourself of the baggage, make use of Japan’s incredible luggage forwarding services.
You can do what we did and forward your bag on to your hotel in Imabari. This means you’re going to have to make do with a small backpack across your two-day Shimanami Kaido cycle, and you’ll need to pack accordingly. I’ve got a more detailed post on packing here, with a downloadable packing checklist.
Or you can use a same-day service like Sagawa Express . You drop your bag off at the facility in Onomichi by 9am, and it’s delivered by 6pm in your stopover hotel by 6pm. Repeat the next morning, sending your bag onward to Imabari. Some people combine the two and forward the large bags on to Imabari, and use the same-day service for an overnight bag, meaning your daypack is as light as it can be.
Note: This is a riskier move because as much as Japan is legendary for efficiency, things can still go wrong. You’re also paying for luggage forwarding twice
Regardless of what strategy you choose, your goal should be to keep your backpack as small and light as possible. Ideally it should fit into your basket or on your panier if you have one, allowing you to literally take the weight off your shoulders if needs be.
Accommodation Planning
When planning a two-day Shimanami Kaido trip, you need to think carefully about the right place for an overnight stopover. I’ve written a more in-depth guide here, but my recommendation is to pick a place around the halfway mark: either on Ikuchijima or Omishima.
For my own cycle, we chose to stay in Omishima. It’s slightly closer to Imabari, meaning that the bulk of cycling was front-loaded onto Day 1. I knew I’d have achy legs either way, so I’d rather cycle a shorter distance on the second day.
You also want to think about what style of accommodation makes the most sense for you. We chose an Airbnb for two reasons:
One, there was a washer/dryer. This meant we could wash and dry our clothes in the evening, keeping our backpacks as light as possible.
And two, we’re both vegan. Having access to a kitchen meant we could plan out our meals, making dinner in the Airbnb and having a proper meal before setting off the next day. Getting enough protein is really important when you’re physically active all day, and most vegan-friendly konbini food tends to be quite carb heavy. For any fellow vegan travellers, I’ve written a vegan Shimanami Kaido guide.
Depending on what your priorities are, you may choose to go the same route and book an Airbnb. Or, if you want to keep it budget friendly, you might go for one of the free campsites. On the other end of the scale, if you want to reward yourself with a luxury stay, you might be more into a beachfront villa like this one.
Whatever you choose, aim for Ikuchijima or Omishima as your halfway stopover point, and book early. The most popular cyclist accommodations often book out months in advance, especially on weekends during peak seasons.
For comparison, we did our cycle over a Thursday and Friday at the very beginning of October. When it came to booking Airbnbs, compared to what I can see from a quick search now, our options were pretty limited. We still ended up with a really great stay, and if you want to stay in the same place, you can book here.
The Route
This two-day Shimanami Kaido route starts in Onomichi and ends in Imabari. Here, I’ll just cover the two days of cycling. Whether you stay overnight in Onomichi or Imabari on either end is up to you!
I’ve broken this down into each day, including the islands you’ll pass through and the bridges you’ll climb. For an overview of all of the islands of the Shimanami Kaido, including things to do and see, you might like my Shimanami Kaido island guide.
I’ve also deliberately chosen not to time-stamp this itinerary, barring the recommended start times. Everyone cycles at their own pace, and I don’t want you to feel like you have to make it to X point by a specific time. If you’re doing a two-day Shimanami Kaido, you’re going to want to have the experiences, take the photos, make the pitstops.
Regardless of your pace, however, each day of this itinerary should get you into your accommodations by around 6/7pm latest each evening, giving you plenty of time to shower, rest and eat a solid meal.
I’ve also simplified this itinerary down into an at-a-glance, downloadable PDF version.
Day 1: Onomichi to Omishima
Day 1 is about getting out on the road and covering the northern islands of the Seto Inland sea. You can expect about 4-5 hours of riding time, covering about 35-40km.
The Itinerary:
- Onomichi Start:
- Pick up your rental bike early, around 8:00am
- Breakfast:
- Grab a bite to eat in a local cafe or back in your Airbnb to get yourself fuelled for the morning’s cycle
- Ferry to Mukaishima:
- Take the ferry from Onomichi port to Mukaishima. It takes 5 minutes to cross and costs ¥110 (including the bike)
- Mukaishima Island:
- Cycle ~5km along the coast of Mukaishima, following the blue Shimanami Kaido line to reach the approach for Innoshima Bridge.
- Bridge 1: Innoshima Bridge:
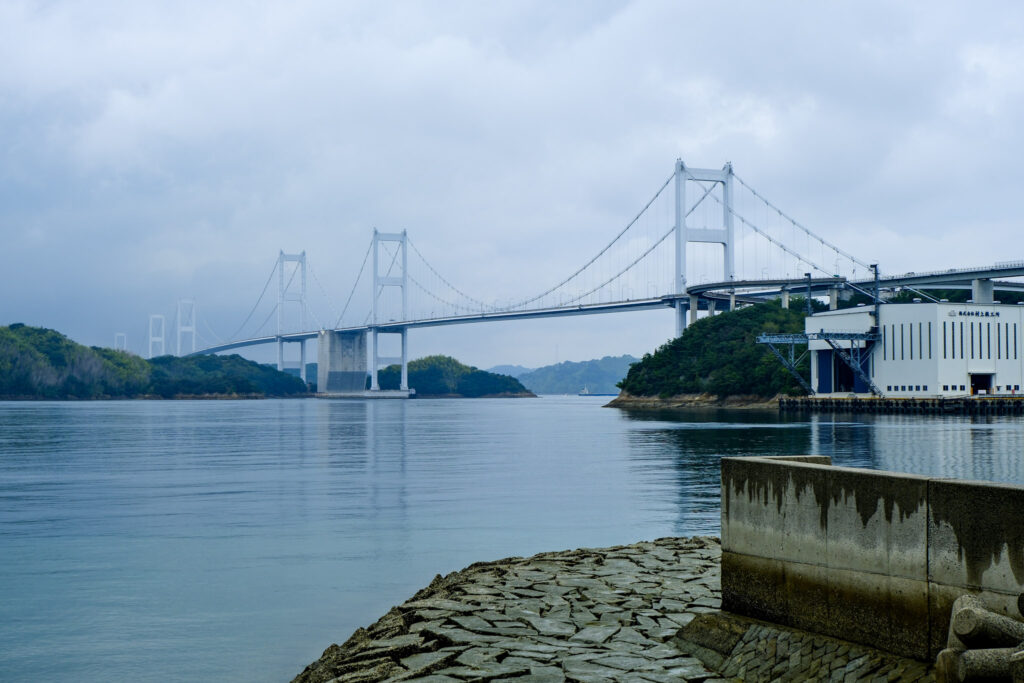
- This is the first major climb of your cycle. The bridge is 1,270m in length and you’ll have about a kilometre’s climb up to the bridge, along a spiral type route uphill. Once you’re up on the bridge, you’ll be ~58m up.
- On the bridge, you cycle on a cycle lane under the road deck of the bridge. It’s an incredibly cool experience, and completely safe and protected away from traffic. On the other side, you’ll get the joy of the downhill run.
- Innoshima Island:
- Cycle along the island’s coastal roads. You may choose to take a detour to Innoshima Suigun Castle, or stop for photos along the way.
- The total cycle length on Innoshima is about 8km, adding in a 2km detour if you do choose to go see the castle.
- Bridge 2: Ikuchi Bridge:
- Your next bridge, Ikuchi Bridge, is about 35m elevation. The Ikuchi Bridge is a cable stayed bridge, about 790m across.
- Ikuchijima Island:
- This is your time to stop for lunch. By the time you get to Ikuchijima, you’ll have cycled about 19 kilometres, and be about halfway through your day’s cycling.
- For lunch, you might choose to take a packed lunch to Setoda Sunset Beach, like we did, or head into Setoda town to visit some of the local eateries.
- In Setoda, you’ll also find the Hill of Hope.
- Your total cycle length on Ikuchijima is about 13km on the main blue line and you can add in about 1km to visit the Hill of Hope if you’re already stopping in Setoda town.
- There are more convenience stores along the route on Ikuchijima so if you need snacks or supplies for tonight’s dinner, now’s the best time to get them.
- Overnight stop: Option 1:
- If you’ve chosen Ikuchijima for your overnight stop, make your way to your accommodation.
- You can spend the evening relaxing by Sunset Beach, sightseeing or just resting in your accommodation.
- Bridge 3: Tatara Bridge
- If you’re carrying on to Omishima for the night, you’re going to cross the third bridge of the day, Tatara Bridge. Like Ikuchi Bridge, this is a cable stayed bridge, at a length of about 1,480m
- Overnight stop: Option 2 (Recommended):
- If your stop for the night is on Omishima, which I’d recommend, you’ll be making your way there now. At this point in the day, you’ve cycled about 35km and you’re halfway through the Shimanami Kaido.
- Omishima has fewer grocery stores than Ikuchijima, but there is a Family Mart just after the ramp down from Tatara Bridge. Grab any last minute snacks, drinks and supplies and head to your lodgings.
Day 2: Omishima to Imabari
- Omishima Start:
- Get up early and prepare to set off by about 8:30am. It gets hot in the midday sun, so make the most of the early morning cool to get going.
- Grab some breakfast, repack your bag and hit the road.
- If you missed the sights yesterday, now’s your chance for a detour to Oyamazumi shrine. This will take you about 6km away from the Shimanami Kaido, but it’s a chance to see some of the island’s sights before you leave.
- Bridge 4: Omishima Bridge
- Because the Shimanami Kaido only covers about 5km of Omishima’s coastline, your first bridge comes up pretty soon.
- Omishima’s arch bridge is the shortest bridge of the cycle route, at only 328m across. This takes you through to the next island of Hakatajima.
- Hakatajima Island:
- Hakatajima is the smallest island on the Shimanami Kaido main route, with only about 3km of cycling on the Blue Line.
- Make a pitstop at Hakata SC Park and stop for a drink or a snack at Hakata beach.
- Bridge 5: Hakata-Oshima Bridge:
- You’re coming up to your second last bridge of the Shimanami Kaido. This is actually two connected bridges that cross over the small Mijika Island. If you’re making good time, you can make a detour off the bridge and head down to Mijika for a look around.
- Oshima Island:
- Oshima is the last island before you cross over into Imabari. This is the longest segment of the Shimanami Kaido, which passes through the middle of the island.
- The stretch between the port and the approach to the Kurushima Kaikyo bridge (the final boss of bridges) is the toughest climb on the Shimanami Kaido, with two long ascents.
- There are a number of convenience stores in the centre of the island, giving you a chance to stop and recharge.
- Detour options on Oshima include Mt. Kiro Observatory Park, which is a very steep climb of about 3.5km, or the Murakami Suigun Museum.
- Lunch Break:
- Just before you get to the final bridge, you’ll reach Yoshiumi Ikiiki Kan, a roadside station. This is your last chance for a proper meal, if you haven’t packed your own. It also serves as a cycle terminal where you can rent or drop off bikes.
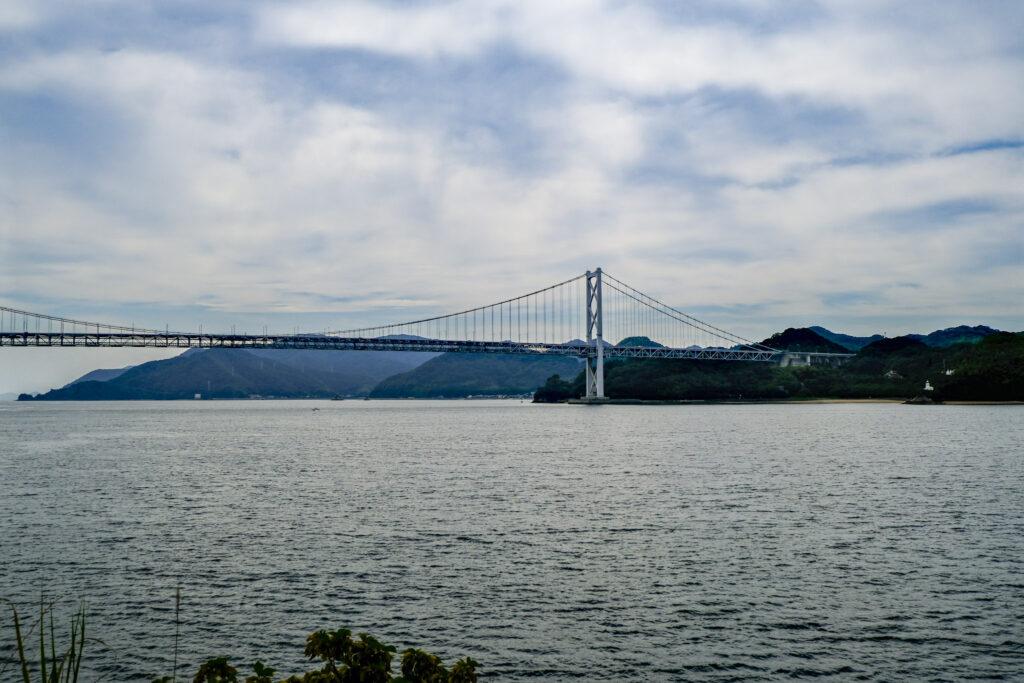
- Bridge 6: Kurushima-Kaikyo Bridges:
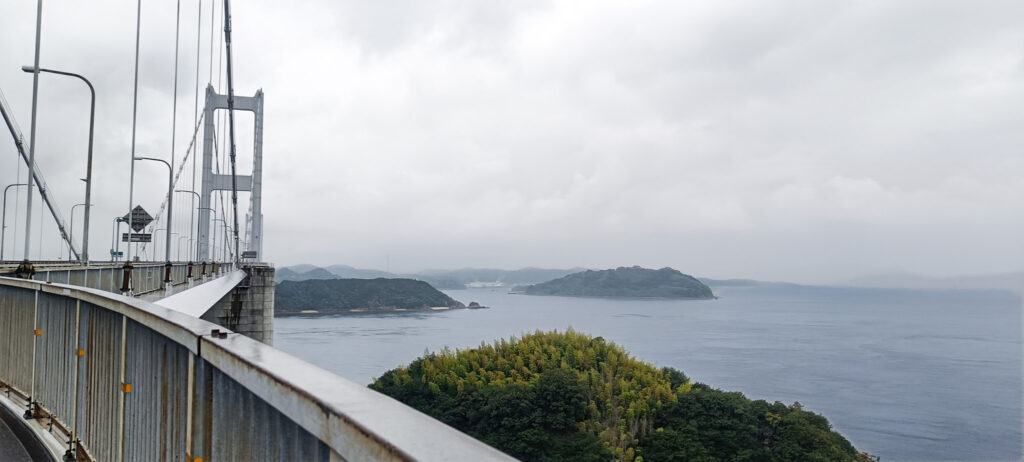
- You’ve made it through Oshima and you’re now at the final crossing. Kurushima-Kaikyo is the grand finale of the Shimanami Kaido. At a total length of 4.1km across, it’s the world’s first triple suspension bridge: three bridges connected in sequence. It’s an incredible marvel of engineering, and doing the Shimanami Kaido from Onomichi makes so much sense because you end up here.
- Cycling over the bridge, you’re going right over the sea in a separate cycle path to the main road lanes.
- There are two rest areas built onto the bridge deck, jutting out over the ocean, allowing you to pause and grab a photo without blocking other cyclists.
- Getting this far means you’ve almost made it, so stop for a moment and take it in.
- Hidden Island: Umashima Island:
- Halfway across the bridge, there’s a detour to take you down to the tiny island of Umashima. This is a place for a pitstop, or even just to admire the bridge from below.
- Entering Imabari:
- Coming off the bridge, the Sunrise Itoyama Cycle Terminal is right by the base, with on-site accommodation. Some cyclists choose to return their bikes here and stay for the night.
- If you are continuing on to Imabari’s downtown, it’s another 6km along public roads. After your two-day Shimanami Kaido cycle, this part is far less impressive but hopefully you’re still riding the high of your final bridge.
- You’ll come into Imabari by the JR train station where the final cycle station lies. This final stop is where the Shimanami Kaido officially ends, and with very little fanfare. There’s no sign to tell you you’ve made it, but you’ve got the sore legs and sweaty clothes to show for it.
- You’ve done it – you’ve cycled the Shimanami Kaido, taking you across the islands of the Seto Inland sea, experiencing the steep bridge climbs and the incredible views.
- Drop your bike back, and go find your hotel to meet your luggage, or head onward to wherever Japan takes you next!
Good to Go
I’ve put this two-day Shimanami Kaido itinerary together based on both my own experience of the cycle as an amateur cyclist, and the research I’ve done and what I’d do differently next time. For the last few weeks, I’ve been working on a series of guides on the Shimanami Kaido, and it’s been such a joy to relive it all.
Even though the route ends in Imabari, crossing the Kurushima-Kaikyo Bridge was the point at which I felt like I’d accomplished something to be proud of. My second day was wet and rainy. My legs were aching, my waterproof jacket was sticking to me, and I honestly even considered bailing and grabbing a ferry onward from Omishima. Getting to the centre of that bridge, feeling the speed of the bike and the wind against my face, I felt pure joy. Here I was, on a bridge, over the sea, in the middle of Japan. As much as I’m trying here, it’s actually indescribable.
The Shimanami Kaido might be a famous cycle route in Japan, but it doesn’t have to be daunting. Even if you’re not an ardent cyclist, and even if you’re not particularly fit, if you can ride a bike, you can do this.
If you’ve read this far, then hopefully you’ve taken away some ideas for your own cycle.
This post is part of a series on the Shimanami Kaido, helping you plan the perfect ride. Get the full guide here.
Final note: In the downloadable version of the itinerary, I’ve included a hand-drawn map of the route, and stripped back the itinerary to only the essential details, making it easy to glance at on your phone. Grab yours now and get good to go!